

Setup Instructions
These instructions are mostly intended for MeshCore repeaters. Some elements will be the same or similar to Meshtastic. If you intend to use your MESHPEATER for Meshtastic, we recommend that you consult the Meshtastic documentation.
First Steps
Prerequisites
- You will need a functioning "Companion" node to communicate with your repeater.
- You will need either the iOS or Android MeshCore app installed on your phone.
- To communicate with your repeater, you will also need to "upgrade" the MeshCore app to the paid version. You can use the in app purchase system built into the app. The cost is a one-time fee of $8. It's well worth the expense.
Tools You Will Need (Allen wrenches are provided with your MESHPEATER)
- 2 mm HEX driver or Allen Wrench
- 3 mm HEX driver or Allen Wrench
- 5/32 HEX driver or Allen Wrench
Information You Will Need
Think of a name for your repeater. It can be anything you want. Some people use their location in the name, others come up with totally crazy names. Just remember that other users will refer to your repeater by name. So making it memorable is a plus. You will also need to gather the following information:
- Frequency (Check your local MeshCore group.)
- Bandwidth (Usually 62.5 kHz)
- Spreading Factor (Usually 7 or 8. Check your local group.)
- Coding Rate (Check your local group.)
- Latitude and Longitude where the repeater in going to be installed)
Note: If you have already ordered your MESHPEATER and submitted our Build Request Form, all of your settings will be pre-programmed for you prior to shipping.
Deploying Your MESHPEATER
Mounting Options
Your MESHPEATER uses user changeable mounting systems to meet a wide variety of installation requirements. Mounts are attached to the MESHPEATER body with four M5 x 8mm screws, It comes with the standard mount installed. It has a V-groove and secures with 2 heavy duty zip ties. This may be all you need.
Optional Extra-Cost Mounts
- Stand-Off Mount - This is designed for mounting to a tower, pole or mast. It has a large V shaped mounting flange that can be rotated 360º to accommodate horizontal crossbars or angled (out of plumb) tower elements.
- Dovetail Mount - This is designed for mounting on wooden posts, fences, fascia boards, etc. It is low profile and includes a dovetail mount plate that slides into a corresponding receiver that is attached using wood screws (supplied).
- Magnetic Mount - This uses 3 very strong Neodymium horizontally aligned magnets to provide a very solid attachment to metal objects.
- Cinch Belt Mount - This uses a 36 inch x 1.5 inch hook and loop (Velcro type) belt that allows ad-hoc mounting to trees, posts or other objects. This is great for camping or other outdoor activities where you want to temporarily mount a MESHPEATER.
Note: Both the MESHPEATER but and the solar panel bracket use the same mounts. Both come with the standard mount. If you order an optional mount, you will need to order 2 mounts if you want to use the same mount type on both assemblies.
Note: On a full charge, you can operate 24/7 for 5 to 7 days before recharging. If you are ordering a mount for temporary field use such as a magnetic or cinch belt mount, you may not need to deploy the solar panel at all.
Connecting The Battery
Note: Once the battery is hooked up it will begin receiving and transmitting. It is always a good practice to make sure an antenna is attached when transmitting. We recommend you attach your antenna or a 50 ohm dummy load before proceeding.
Your MESHPEATER is shipped with the battery unplugged from the circuit board and is only partially charged. To connect the battery, follow these instructions:
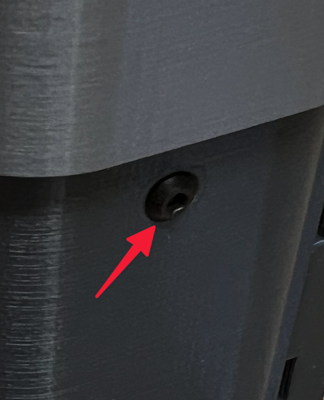
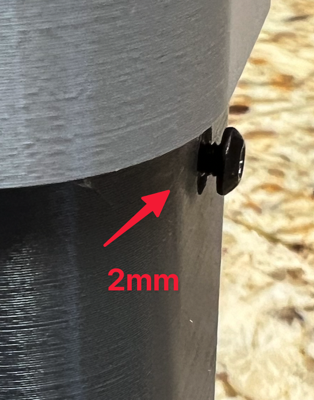
On the right side of the MESHPEATER loosen the M3 x 8mm retainer screw that locks the electronics carrier in place. This requires a 2mm hex driver or Allen wrench. You don't need to completely remove it. Just back it out approximately 2mm until you can lift the cap up and slide the electronics carrier out easily.
Be careful! The screw is small and easy to lose. We provide an extra one if ever needed.
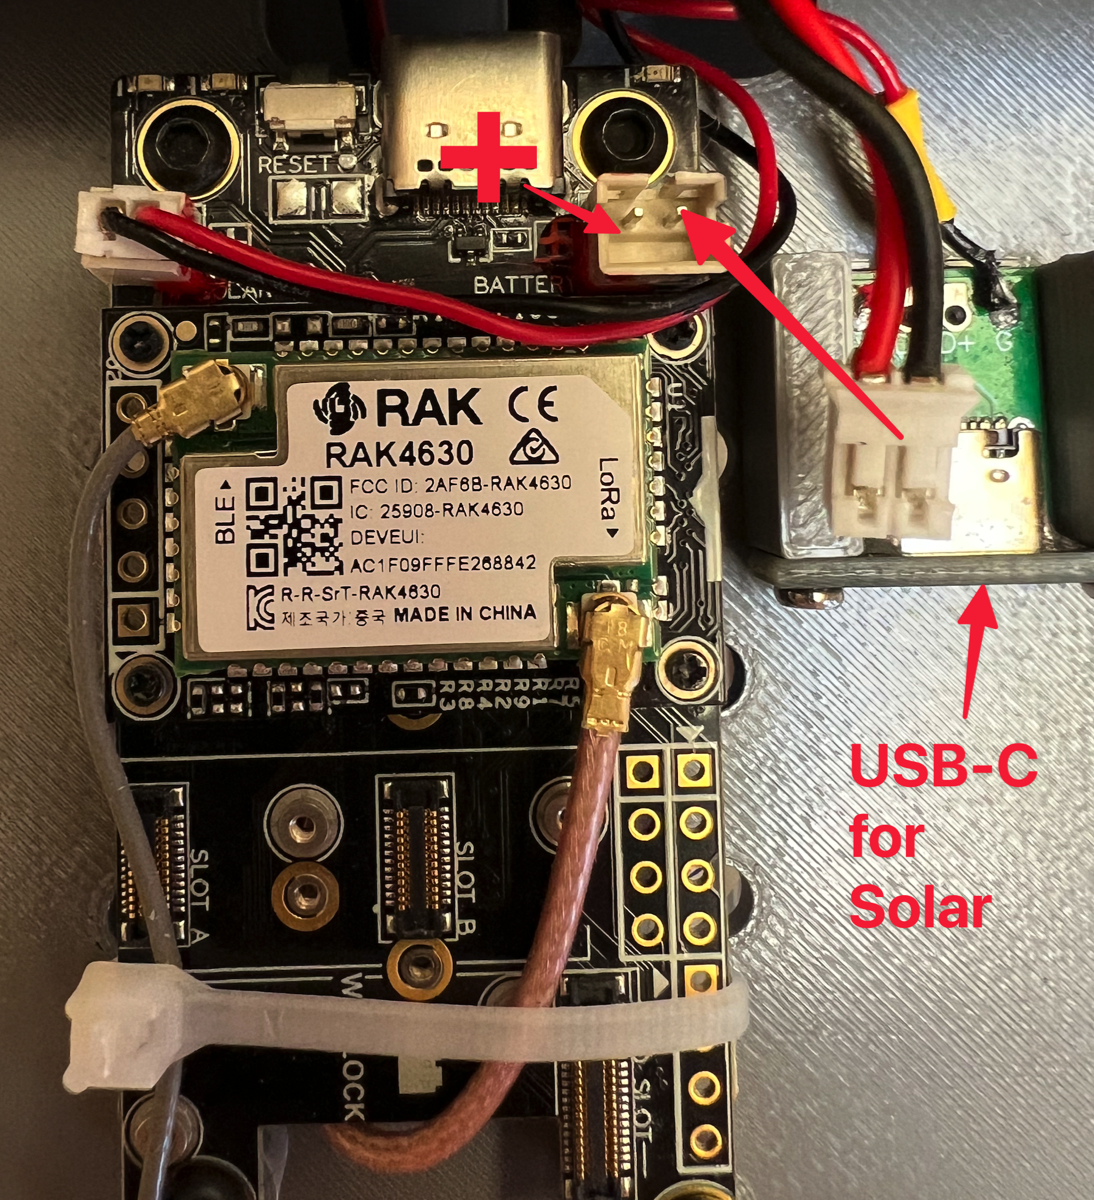
At the top left corner, there is a JST ZH 1.2 connector for the solar panel connection. It should already be attached to the USB-C connector on the right. The solar panel will connect there.
The battery leads terminate with a male JST PH 2.0 connector. There is a corresponding female connector at the top right corner of the board. POLARITY is important! The circuit board is not well marked. For the battery connection, looking straight on, the + (positive red wire) is in the left. The - (negative black wire) is on the right.
Go ahead and plug the battery into the open JST PH 2.0 connector on the board.
Next, you will plug in the solar panel. This does not have to be done immediately, and you can wait until your MESHPEATER is installed on-site. Your battery should be able to operate for at least 2 days before requiring recharging, so just make sure you get the solar panel attached before then.
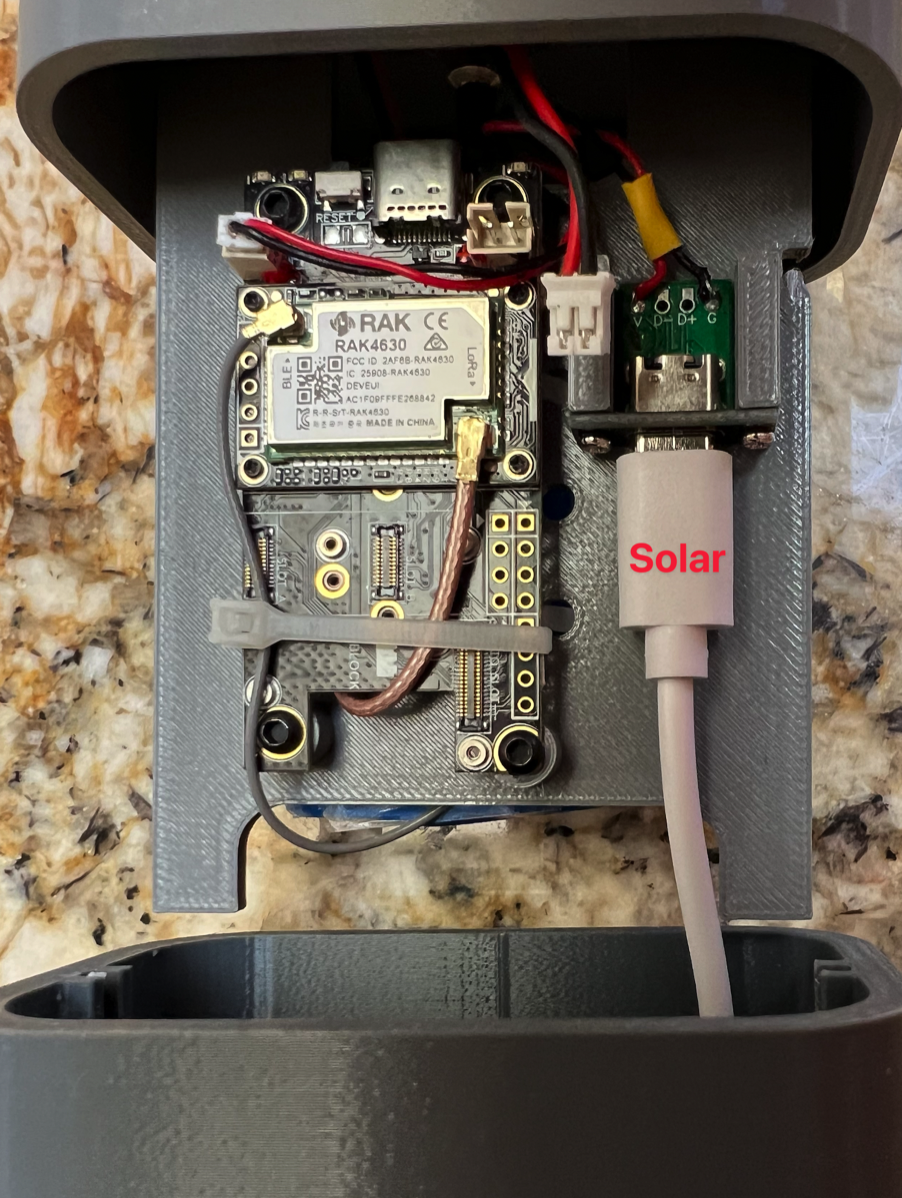
The solar panel is a 5 watt, 5 volt panel with a USB-C connector on the cable. On the bottom of your MESHPEATER, you will see a rubber grommet. Push the USB-C connector through the grommet and connect to the USB-C port as shown below.
If it is more convenient to attach the solar panel later, you can do that easily. The MESHPEATER was designed so you can mount the housing and remove the electronics without unmounting the housing. After installing the MESHPEATER, simply loosen the screw, pull up the top cap exposing the electronics carrier and plug in the USB-C cable.
You can now reassemble the MESHPEATER and finish up.
Below is a helpful video that explains Meshcore REPEATER installation. We recommend you take a few minutes and watch this video even if we installed and configured Meshcore for you. This will deepen your understanding of Meshcore operation and explain a couple of things that we cannot configure for you but will need to finish yourself in your home area environment.